Carrier Accounts
Once karrio is up and running, the first thing to do is to register your carrier accounts. The carrier accounts you register will be used to process all other requests such as shipping rates, shipping labels, and fetching of tracking statuses.
Adding a carrier account
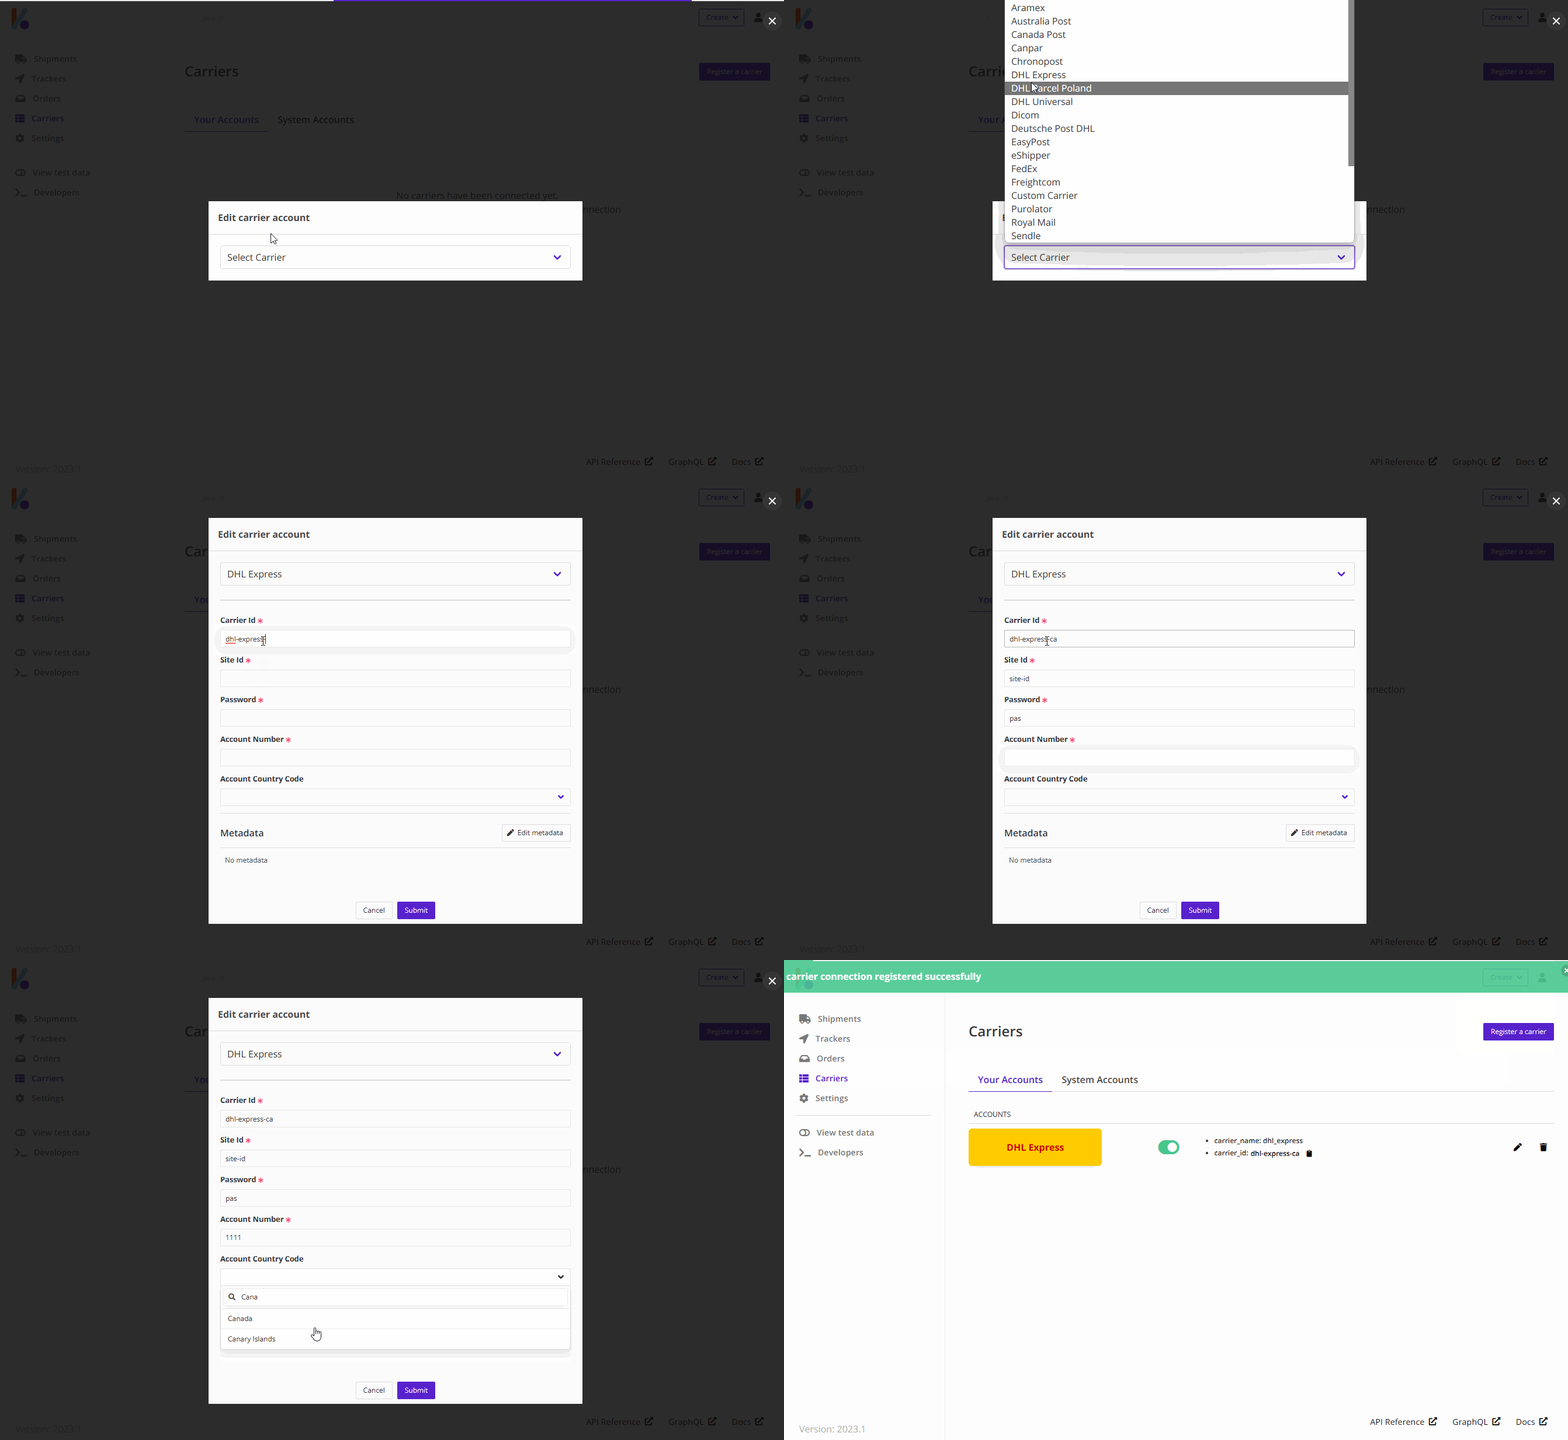
You can register your carrier account using the karrio Dashboard.
To add a carrier account
- Go to the
Carrierssection. - Click
Connect Carrier. - Select your prefered carrier.
- Fill in the account and API credentials.
- Click
Submit.

System carrier accounts
When you sign up to a Karrio instance, you can get access to preconfigured carrier accounts. This is convenient because you get to test and use a carrier services without having to register your own account.
caution
Note that when you deploy your own karrio instance, you will only have access to your own registered carrier accounts.
You can choose to opt-in to the system carrier accounts by enabling them for your karrio user account.
To enable a preconfigured carrier account
- Go to the
Carrierssection. - Click
Karrio Accounts. - Toggle on desired carrier carrier connections.
info
- As a karrio instance owner, you can also provide preconfigured carrier accounts to other users.
- Preconfigured carrier accounts can be setup and made available to other users from the administration panel.
- Your users will be able to use the functionalities that are activated without seing the accounts details and credentials.
Next steps
- Got a question? Ask here.